Search This Blog

6.27.2011

Village Visions

There is nothing quite like the thrill of thrifting. I don't know what it is but there's something so exciting about a well stocked thrift store. Of course, there's a lot not to like; the over-crowded aisles, the disorganization and the general smell to name a few. But let's just focus on the positive, shall we? 

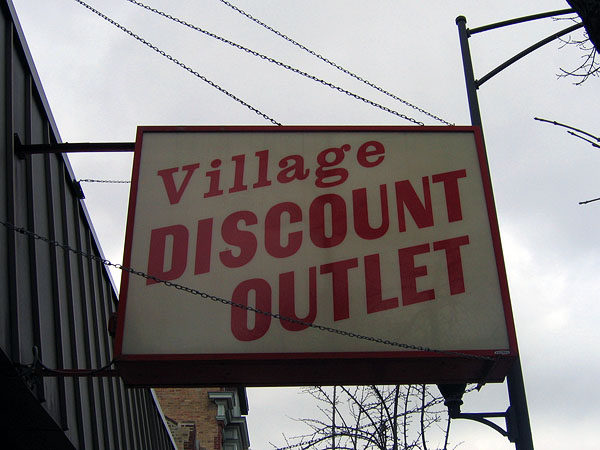
When Mary and I get the itch to thrift we like to hit up our favorite local spot, Village Discount Outlet. These bad boys are all over Chicago and Northwest Indiana so if you live in either state there's a good chance you have a Village near you.


Before you start thinking this is just an ode to Village Discount, let me just explain why I bring it up. Mary and I decided it would be fun to do a segment of sorts about our fun thrift store finds. And so "Village Visions" was born.

The thing about thrift stores is that it's really a hit or a miss when it comes to finding anything worth buying. Sometimes I find myself fooled by the low, low prices and when I get home I wonder why I ever thought I needed yet another clear glass vase. Sure, it was $.80 but I already have three just like it. It's taken a while but I've learned to go in with a plan. The plan goes as follows:

Know what you're looking for.
Know how much you'd like to spend on it.
And stick to that.

Of course from time to time I find something too good to pass up. Sure I wasn't looking for it, but that's because I didn't know it existed. So my general rule of thumb is that if it gives me sweaty palms, butterflies in my stomach and I'd sell my first born to own it then I can take it home. Ok, so maybe that's a bit dramatic but you get the idea.

So when Mary and I went to the Village a while back with a pretty simple game plan. We needed more decorative stuff for the apartment. Simple enough, right? And here's what we found.

Check out these beautiful, shiny, ladies. They are candle stick holders when you flip them right side up, but we figure we can use them for votives too. See how you could easily plop a votive or tea light into what is meant to be the underside? At $.50 a piece it was a steal. There were more there but we settled on three because we love uneven numbers for decorating.


Here's a gratuitous shot from above just because they're so shiny and pretty.


We also found two of these gorgeous bowls at $.80 a piece. We love the square shape and the texture on the sides. They can be used to put out candy for guests, serve chips with salsa and guacamole or even enjoy our morning cereal. And not to be a label snob, but check it out.


That's right. I even found similar ones for sale online for $15 each. Pier One is reasonably priced so we probably could have found these on clearance for $3 each but then again, we didn't even pay $3 for the two we brought home. So score one for sawyerthree.


This little guy is maybe my favorite thrift store find ever. I know it looks simple and it is but I find it so charming. It's just a scrap of fabric. It was in a ratty frame but I loved from the moment I set eyes on it. In fact, it's even awarded itself a place on our Great Wall of Frames. In a new and freshly painted frame, of course.


Here is the last find in this edition of Village Visions. Not one, but two sets of bookends. You might wonder why one would need so many book ends and it's a fair question. A question I don't have an answer to. I just love them and I'm fairly certain Mary does too. If not, she's a very good friend. I just love how intricate they are. And while they look pretty great as is, I can definitely see us whipping out a can of spray paint at some point to give them a funky makeover. Turquoise anyone? They are so cute. I found myself going all paparazi on them in our dining room but I was able to hold back and only bore you with one picture.

So there you have it! I'm sure we'll be back very soon with some more thrift store finds. In the meantime, we'd love to hear about yours!

6.14.2011

Dresser

When Sofia, Meghan, and I first moved in to Sawyer Three, we were inspired by the plethora of freedom that was bestowed upon us, and decided to express ourselves with.. well a plethora of colors. With a yellow sunroom, orange living room, green dining room, blue kitchen, and pink bathroom (which you witnessed the transformation of here), and not to mention purple, green, and gray bedrooms, we were living in a crayola box. Please don’t judge us; we have since learned to calm ourselves and slowly transform our apartment into an oasis of cohesive luxury. Too far? Well we've come a long way..

In the midst of pulling colors left and right, we thought, “what would go better in an orange living room than a purple dresser”, duh. Again, we are two years older, and much wiser, and have since changed our living room walls to represent the soothing tone that we would like to represent our penthouse:


Our purple dresser no longer had a place in this living room and desperately needed a makeover. We snagged this dresser from an estate sale when we moved into our apartment. Speaking of, most of our furniture came from that estate sale, and I recommend that for any college grads looking for furniture. Back to our dresser:


I am in love with this handle. Greek god meets mermaid...


The challenge with this piece of furniture, was that the colors needed to match: our new soothing walls, the black frames on the walls, our dark wood coffee table, grey and white space rug, and tan couch covers. My goal was to somehow make the whole room feel cohesive, and not let the dresser be the main attention of the room. For the new colors I chose:


I wanted to the colors to be similar, so there was no drastic difference between the drawers and base of the dresser.

And without further ado, our new dresser....


6.13.2011

The Great Wall of Frames: Part Two

It is finished!

So a few weeks back I mentioned that Mary and I were working on a wall of frames like the one the Petersik's over at Young House Love did in their house. You can check their beautiful wall out here. Up until a few short days ago, this is what our hallway looked like.

Pretty bland, huh?

So with the frame wall inspiration fresh in our minds we got to work. Read about how we collected the frames and the things inside them here .

Then it was time to hang everything. This is the tricky part. We knew we wanted the arrangement to be semi-random. I say semi-random because there is a fine line between organized randomness and throwing caution to the wind. Guess which side of the line we hang out on.

We decided the best way to get the semi-random look we were going for was to lay the frames out on the floor in front of the wall.

That way we could see the arrangement before we made 100 little holes in the wall. We find the best way to start is in the middle. We knew we wanted this baby front and center to pay homage to the bloggers who inspired us.


Once we knew where we wanted the first frame to go it was easy to build out. For us, it's not a big deal if the space between frames isn't the same all the way around. That's what gives it that semi-random look.

Once we had the arrangement exactly how we wanted it (after moving things around, taking a step back to look, hating it, moving things around again, rinse and repeat) it was time to start hammering.


We hung the Petersiks first and worked our way out. Here's what it looked like after a little progress.


About half an hour later we had this.


Cue the whomp whoooooomp. Nothing is worse than a crooked picture. Except maybe 25 crooked pictures. We knew we could not live with a crooked gallery for long so we had to do something.


Well hello double sided mounting tape! What a lifesaver! All we had to do was whip out the old level and apply a small piece of mounting tape to the back side of the bottom of each frame and presto chango, we had this beauty!

Don't mind the crappy lighting/picture taking skills. It was all Mary. Just kidding, it was me. But you get the point, right? We love it. And since taking the picture above I've already found another cute addition. That's the great thing about a wall of frames like this one, you can add frames, remove frames or change things out to keep it looking fresh. Trust me when I say my picture does the wall no justice. It really adds a lot to the space! Ok, I'm done gushing about it now.


6.03.2011

Headbands

I have the cutest nieces in the world. No contest.

The last headbands I made for Cora and Lucy looked like this:


Cora is actually wearing both of them (Lucy wasn't in a headband mood at the time).


When I was visiting my mom in Arizona she let me take a look at her fabric selection, and take a some back to Chicago. (My mom is a talented quilter, sewer, crafter, etc.).The blue floral fabric came from my Grandma in Texas. She got the fabric from my Great Granny Flossie’s farm. It was used as chicken feed sacks, then people would use it to make dresses, and then the scraps to quilt. I love using fabric/supplies with a little history to them.


I started by cutting each fabric into three long/wide strips. I did not measure exactly the width and length, but it was about 4" x 30", and then I folded the pieces under and in half.  


Next, I braided the fabric together and sewed off the ends...


I decided to use Velcro because I am not one hundred positive of their head sizes, so the Velcro will leave room for growth/error.


Next I made flowers out of the coordinating fabric for each braided band...


...and chose a button for each.

 
I have a bag of assorted buttons that has lasted for years. Literally since high school. It has slowly dwindled down after random projects. Most of the buttons are mismatched, but the perfect one is always in there...


I love the way these turned out.

Lesson learned: Never underestimate the size of a child's head. I had to add length onto one of them, but the structure allowed for that adjustment, so it was not a problem.

Favorite moment of this project: Watching Lucy put on her headband and exclaim: "It looks great on me!"

Mission accomplished.